VolunteerPress installs the same way as any WordPress plugin you upload yourself: download a zip file, upload it on the Plugins screen, activate it. Nothing is installed on your computer.
Before you start
- You need the VolunteerPress zip file. Request it on the download page — the download link appears as soon as you submit the form, and a copy is emailed to you. Save the zip where you can find it, and do not unzip it.
- You need an administrator account on your WordPress site.
Install the plugin
- Log in to your WordPress admin (your site’s address followed by
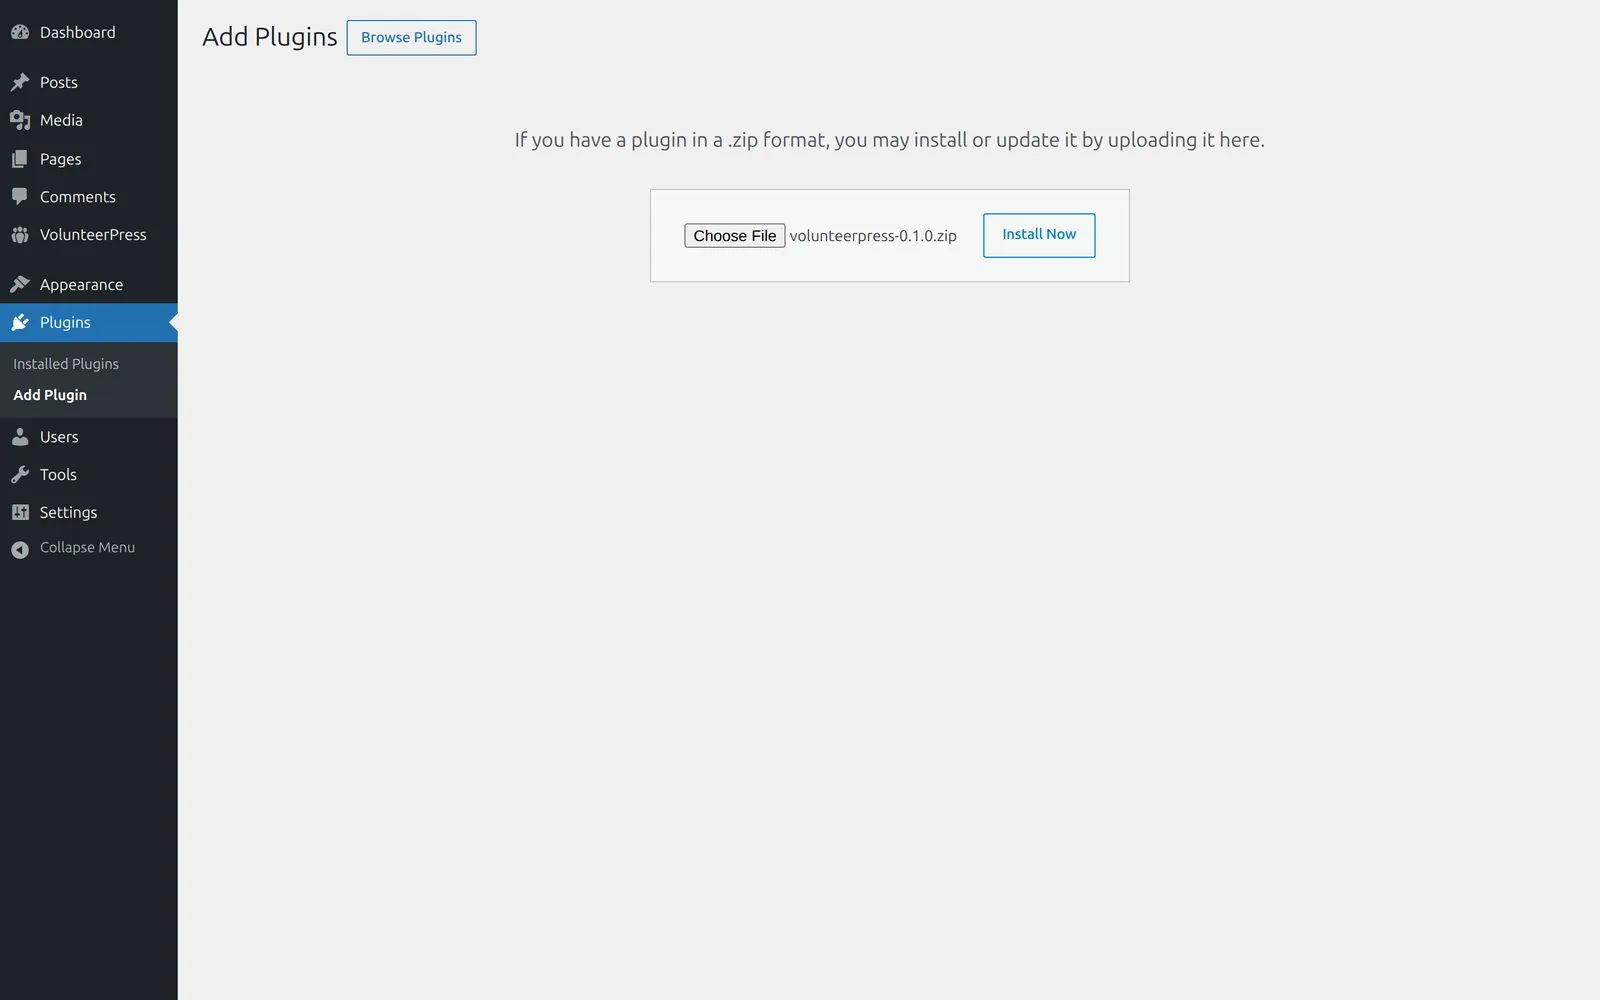
/wp-admin). - Go to Plugins → Add New, then select Upload Plugin at the top of the screen.
- Select Choose File, pick the VolunteerPress zip you downloaded, and select Install Now.
- When the upload finishes, select Activate Plugin.
Check it worked
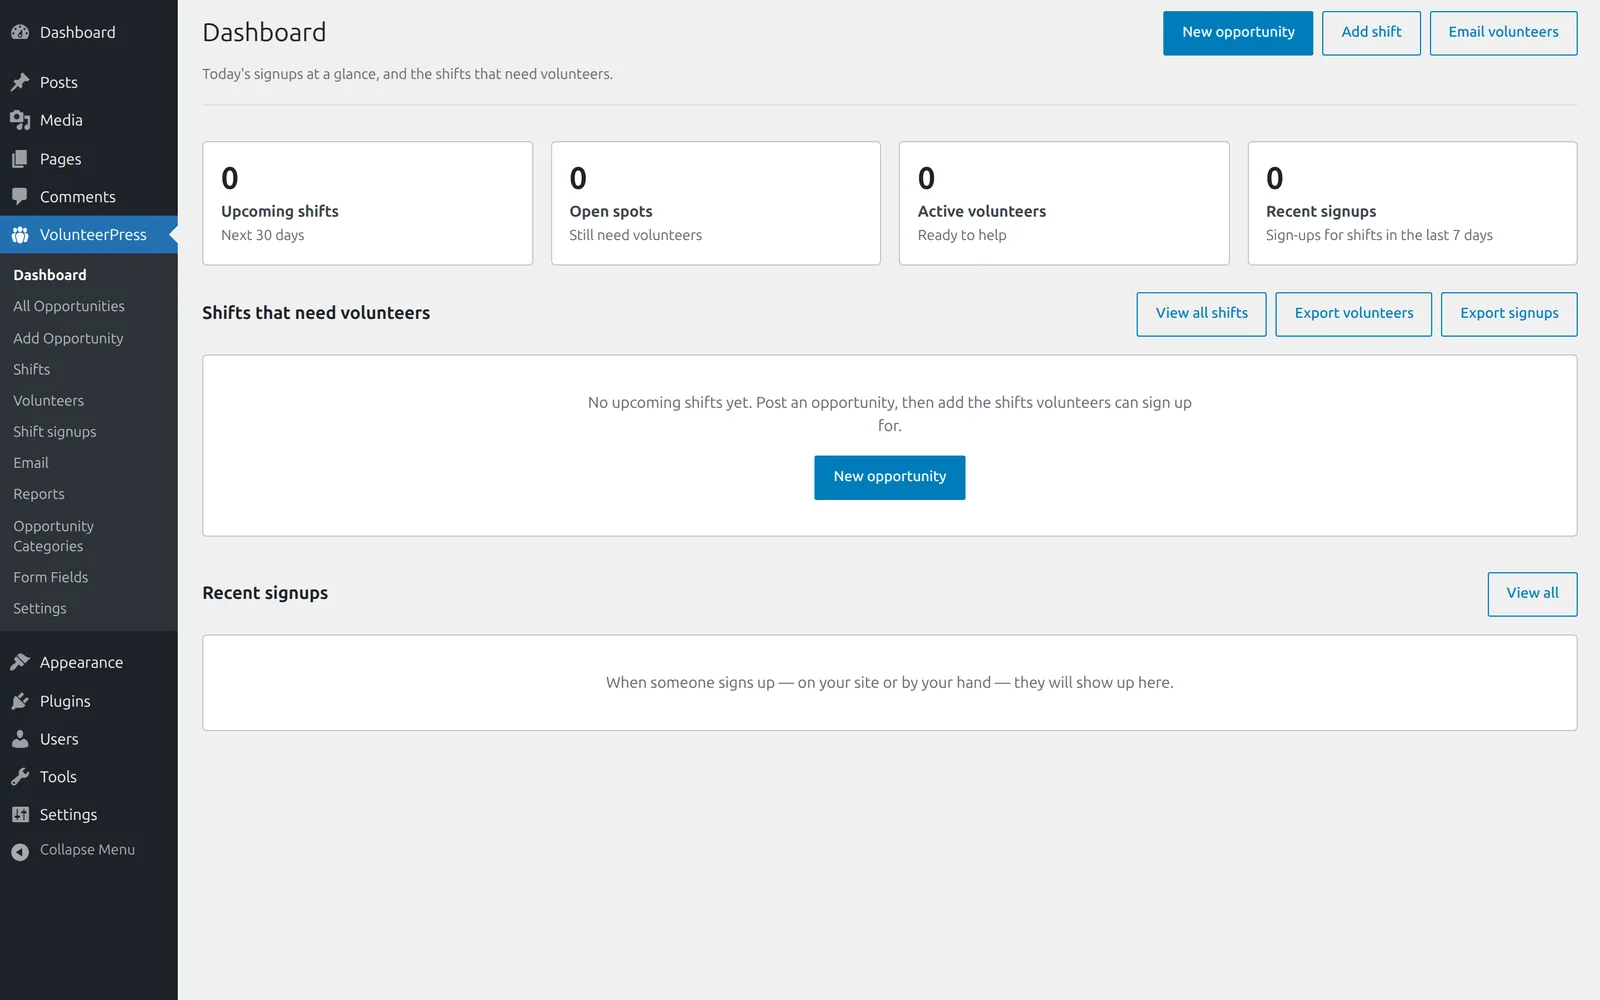
You will see VolunteerPress in the left-hand admin menu. Open it: a dashboard appears, with All Opportunities, Shifts, Volunteers, Shift signups, Email, and Settings among the items beneath it in the menu.
Updates
Updates appear in your WordPress admin automatically, like any other plugin: when a new version is available you will see an update notice on the Plugins screen and under Dashboard → Updates, and you update with one click. There is no separate account, license key, or re-download to manage.
Next: Your first opportunity.